Sunday 25 September 2022

Design A444 - In Green Cotton

I am still ploughing on with using up the aran weight cotton yarn, I'm getting there but not there yet.  I have some very bright yellow that I have used as flower centres but it's not really the colour that I hoped for when I ordered "lemon".  I was expecting a nice pale yellow and I got this "lemon rind yellow" colour.  That'll teach me for shopping and ordering when I am tired, I obviously wasn't paying full attention. 

So, now that I just have a whole load of bright yellow doing nothing I decided to over-dye it to make it more usuable and a more appealing colour cos it's going to take someone really special to pull that bright yellow off.  Pass the sunglasses.  I bought some dye for cotton, Dylon handwash dye in shade "Ocean Blue".  I wound the balls of cotton onto my niddy-noddy and tied each one off loosely so I had 7 and a half skeins.  You have to make the ties loose when you dye otherwise you can get a tie-dye effect, I don't want this at this time. This dye is a "cold water" dye, you don't actually use cold water per se, it is warm but only hand-warm, not really hot to boiling like my other dyes that I use.  I made it up in my dye pot as per the instructions and lowered the skeins of yarn in and followed the instructions for timings etc.

All dyes that I have used, no matter what kind, react with the base colour of the yarn or fabric that you are dyeing so you have to take that into account and so "standard colour mixing rules" apply i.e yellow + blue = green, yellow + red = orange, blue + red = purple, blue + red + green = brown, you get the idea.  So I know that blue dye on a yellow yarn is going to make green, but what shade of green.  I am hoping, based on the shade of blue dye I've picked, that it might come out leaning toward the olive green tones but I am not familiar with Dylon dyes so I don't really know what their shades are like.


So, its not come out Olive green but its decent but if you look closely its not totally even, a few flecks of yellowy-greeny bits still exist, not bright yellow but not fully green either.  Not what I'd hoped for but it does add interest that I can live with.

Once dry I decided to make the same design shawl I made earlier in the year.  Due to the fact that this one is cotton and smooth and more dense it looks different to the white fluffy acrylic version, its not as cuddly, but that's different fibres for you, they all have their own look and different properties


Wednesday 21 September 2022

I've ordered myself something for Christmas - again!

I enjoyed last years Fibre Advent Calendar, I've not spun much of it yet, but I will get to it soon enough.  They've changed it a bit for this year.  There will be only 50g of fibre each day but it will be more luxurious than last years and it will be lower priced too.  I was happy with last years price and the fact that you had 100g a day which meant that you could make something decent with each fibre braid.  I don't really mind it being a smaller amount, I've still ordered one.

Again, its a limited edition of 250 so once its gone, its gone and it won't be dispatched until around about 18th November.


I can't wait to receive this now, sounds intriguing what they've been chatting about on the groups etc and instead of individual slips in the packages we are having a scratch card this year with the details on it.


Multi-coloured and Ecru blanket/throw

I quite enjoyed making the pink/purple/red blanket throw so I am going to make another using an array of colours, still sticking with 12 though, and I am going to take it a little bigger and start with 6 centres of each colour, giving me 72 motifs in total for a 6 x 12 formation.


Again, I made a list and worked it out so that two similar colours were not next to each other and that no two motifs were the same, some are similar but not exactly the same.


As last time, I had all the motifs in piles of 6 based on the centre colour.  I knew that this time I was just making it longer and it would be a 6 x 12 formation, which then means that the piles of motifs need to be in two rows of 6 to begin with.  I then arranged them by centre colour, light, dark, light, dark, light, dark and then second row dark, light, dark, light, dark, light and then made sure the colour type were well spread as best I could as I didn't really have 6 light and 6 dark, more like 5 and 7.  

Leaving the bottom motif where it was I then took each pile from the first row and placed it in the third row but dropping it down by one motif and I done this for each pile in turn, row by row until all 72 motifs were out.  Then I had the task of making sure that no two motifs next to each other had the same colour last row and if I did I find that then I always swapped with another with the same centre colour and I kept going until I was happy with that and then done a check on the middle round and took whatever swaps steps were necessary there. The final step was just to make sure that there weren't large patches of red or purple or whatever in one place and that as best as possible that all colours were are evenly spread out as feasibly possible.  Once happy I used some of the safety pins and I connected each motif in place using one of the chain spaces to make sure they didn't get mixed up.

I tried again to figure out the instructions but they are still not working for me as they are written so I know what the pattern is intended to be and how many repeats are needed its just that the written instructions don't add up and I can't even figure out which bit is wrong due to constant noise from one person or another, and not necessarily in this house, neighbours seem to be constantly mowing grass, drilling into walls, hammering and banging and I can even hear one person's washing machine through the thick concrete wall and it making more noise than the one that's actually inside my own home! Its infuriating!

I didn't take as many work-in-progress photos this time, for some reason, so I don't really have anything to show now other than the photos of it pinned out to dry.  Oh, yes, I added the same edging as last time which was...  "Three rounds, starting with a base round, then a round of V stitches and finally the shell with picot edging, with a special version for the corners".


The photos above show it finished but before blocking and the lower one shows it pinned out blocking to shape.  I haven't gotten any decent photos of it yet, I need to figure out how I want to show it off but I will get them when I can.

Saturday 17 September 2022

Dyeing the Whitefaced Dartmoor for a second time

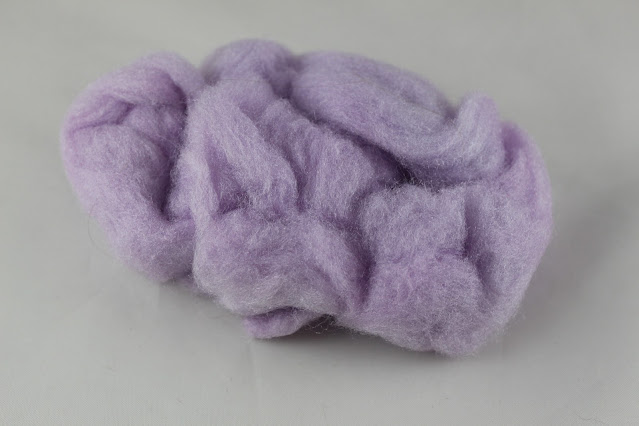
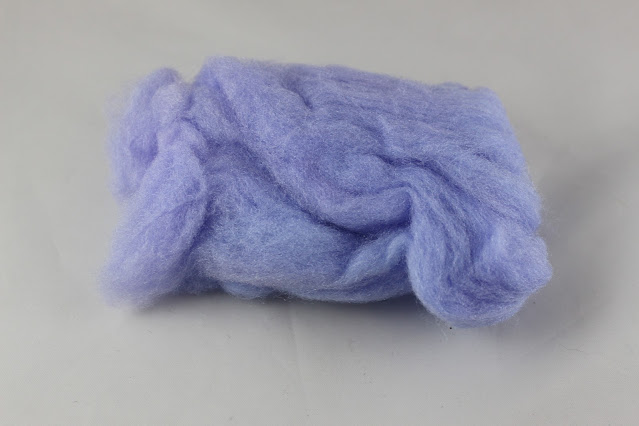
 A couple of weeks ago I tried to dye some combed Whitefaced Dartmoor wool using some left over cold water dye.  It didn't work.  At best it turned some of the outer-fibres of the hand combed nests a very very pale silver grey but it hadn't gotten down into the inner fibres. Today is the day that I am going to give this fibre some colour.

I am using my usual Greener Shades Dyes and have chosen to dye this at 0.5% dye depth (half a gram of dye per 100g of dry fibre), there is 282g of fibre and the dye is made up of 75% River Blue, 25% Amethyst Purple.

I did loosen the hand combed nests a bit before putting them in the dye pot in the hopes that the dye would reach all of the fibres and I am happy with the results.  The plan is to use this fibre in my own blend and add some other fibres and colours to it to make it more interesting and to add a bit of softness as well.


An interesting patchwork of blue and pink-y purple that I am sure will eventually make an interesting spun yarn and then go on to be made into something that someone would love to buy from me.

Sunday 4 September 2022

A full day of dyeing stuff

I had quite a few things that I wanted to dye or over-dye so I set aside a full day to do as much as I could, time and available space to get it dry depending.

The first thing that I tackled was a shawl that I finished crocheting at the beginning of the year but was not happy because the yarn was darker in one part than the rest and this dark stripe ruined the shawl.  I had to buy dye specifically for this as my usual dyes don't work on cotton.  I have already blogged about the shawl and updated the post to show the finished dyed version and you can find that here.

I used a cold water Dylon dye in shade "Burlesque Red" and followed the instructions.  The water isn't properly cold, it has to be hand warm to begin with but doesn't require any further heat.  The shawl has come out pretty good though, I'm happy with it.


What I did do, whilst this shawl was having a nice soak, was to take a clean empty jam jar and scooped a small amount of dye water out of the dye pot and then pull off a 5g clump of undyed trilobal nylon from the 100g clump I have and pushed it into the dye water in the jar.  I made sure it was fully submerged and just left it on the side for about half an hour.  

The colour is nothing like the shawl, not even close, you would not think it was dyed using the exact same stuff at the exact same time.  It has come out a pale purple colour but evenly dyed though and this will now go into my "ingredients cupboard" for use to add a bit of shimmer when I make my own fibre blends.


The next thing that I dyed was some bright yellow cotton yarn that I would like to tone down a lot to make a more usable and appealing colour.

I have chosen the same cold water Dylon dye but this time in shade "Ocean Blue", fully aware that over-dying something yellow with blue will no doubt make it become green.

I'm happy enough with the result of the yarn, not ecstatic, but it's fine.  I also tried to dye some wool using the left over from the dye pot as it is supposed to be able to dye wool, just a much paler shade than you get from dyeing plant based fibres.  It didn't work, barely touched it, so I laid it to one side to dry until I could get around to using my usual wool dyes.


I done the same thing with this dye pot, I took a clean empty jam jar and scooped a small amount of dye water out of the dye pot and then pull off a 6g clump of undyed trilobal nylon and pushed it into the dye water in the jar.  I made sure it was fully submerged and just left it on the side for about half an hour.  

The colour is nothing like the yarn, but then I don't expect it to be given that I am dying something white with blue dye so of course it will be blue.  Again the result is evenly dyed and this will also now go into my "ingredients cupboard" for use to add a bit of shimmer when I make my own fibre blends.


The final thing that I wanted to dye today was the last of the white Jacob fleece that I have had a number of years, since 2014.  I had already chosen a dye and despite the poor results from trying to dye some Whitefaced Dartmoor wool in the left over blue dye I decided to still give it a go with the cold water Dylon dye in shade "Olive Green", given the fact that this is fresh unused dye and not left overs.  I have to say that it didn't work.  The results were poor and actually looked like it had been stained with urine.  Not nice at all.  However, the clump of trilobal nylon that I had dyed in the jam jar came out a lovely shade of very pale olive green.


So I now have two decent-ish amount of wool that is wet from a failed dye attempts.  The Whitefaced Dartmoor I am happy to allow to dry because its kind of a pale silver colour right now but the Jacob needs to over-dyed right now.  I dig out my wool dyes and shade book and I get to doing some complex maths and weighing out the dyes I need.  I chose a dye depth of 1%, that is 1g of dye for every 100g of dry fibre so its a good job I knew how much it weighed before I put it in the dye pot earlier, 427g.  I made the 4.27g of powdered dye up using 45% River Blue, 45% Sunshine Yellow and 10% Ruby Red and got cooking - the wool dyes require high temperatures.

I am happy with the results and can't wait to see what it will look like when it is combed and made to look nice and fluffy.


I also dyed some Trilobal Nylon with this dye by scooping some of the dye water into a jam jar with a small clump of the Trilobal Nylon pushed down into it.  This dye normally requires heat but I gave it a go with just it being stood on the side for about half an hour and it kind of worked.  Its not evenly dyed but it did take up some of the dye anyway so that's OK and I have some Trilobal Nylon from an old supplier that is just like this, not evenly dyed, and she gets away with selling it like that so I'm happy enough.


Friday 2 September 2022

Pinks, purples, reds and white blanket/throw

Having had a break from using up the aran weight cotton whilst I finish my British Sheep Breeds project I need to get back to working on using it up as I still have a lot left.  I have recently ordered some more in colours that I can use as a colour that ties all the other colours together so I have a new batch of white and a new batch of ecru for that purpose.

I found a pattern that I liked that uses 12 colours plus a main but its for a huge bed throw so I am going to make it but in a smaller size and I've chosen to start with the various pinks, purples, reds and one peach that I have in my left-overs.


I made 5 centres in each colour, giving me 60 and then added round two, 5 of each colour across the 60 and then the same for round 3.  I made a list and worked it out so that two similar colours were not next to each other and that no two motifs were the same, some are similar but not exactly the same.


I had all the motifs in piles of 5 based on the centre colour.  To work out placement of each motif I first decided on configuration of the final item and decided on a 6 x 10 formation, which then means that the piles of motifs need to be in two rows of 6 to begin with.  I then arranged them by centre colour, light, dark, light, dark, light, dark and then second row dark, light, dark, light, dark, light and then made sure the colour type were well spread.  

Leaving the bottom motif where it was I then took each pile from the first row and placed it in the third row but dropping it down by one motif and I done this for each pile in turn, row by row until all 60 motifs were out.  Then I had the task of making sure that no two motifs next to each other had the same colour last row and if I did I find that then I always swapped with another with the same centre colour and I kept going until I was happy with that and then done a check on the middle round and took whatever swaps steps were necessary there. The final step was just to make sure that there weren't large patches of red or purple or whatever in one place and that as best as possible that all colours were are evenly spread out as feasibly possible.  Once happy I used some of the safety pins that I had bought for the British Breeds Project and I connected each motif in place using one of the chain spaces to make sure they didn't get mixed up.

When it came round to the joining of the motifs I tried to follow the pattern but it didn't work out for me, depending on how you read it you either end up with 5 "corners" or 3 "corners when it should be 4 corners on each motif so I ended up doing the pattern but figuring out the repeats myself.  The instruction for how to handle corner joins was there in the pattern notes but not in the instructions where it was needed and it took me a while to find it and figure it out and I made sure that all the joins were in the same format, like when you do cross-stitch you make sure all the bottom stitches face the same way and the top stitches all face the opposite way to the bottom so that you have a smoother, neater finish.


There was no finishing edging in the pattern, which I think is weird for something like this so I found one myself and added it all the way around.  Three rounds, starting with a base round, then a round of V stitches and finally the shell with picot edging, with a special version for the corners.


The photos above show it finished but before blocking and the lower one shows it pinned out blocking to shape.  I haven't gotten any decent photos of it yet, I need to figure out how I want to show it off but I will get them when I can.